How to Create a Web Browser using Python and PyQt5 for Windows?
Creating a browser for Windows pc and laptop is quite an ease using python and PyQt5. For that, you first need to install a few programs on your PC and then just put the python code in the editor and you’re good to go.
Software Required
Creating python based browser required to install of only two software:
- Pycharm Community Edition (the latest version, Make sure to download the appropriate version of it)
- A stable version of Python
Steps in Making Python Browser for Windows 11, 10, 8.1 and 8
Following are the four easy steps to make a python browser:
Step 1: Create a New Project in PyCharm
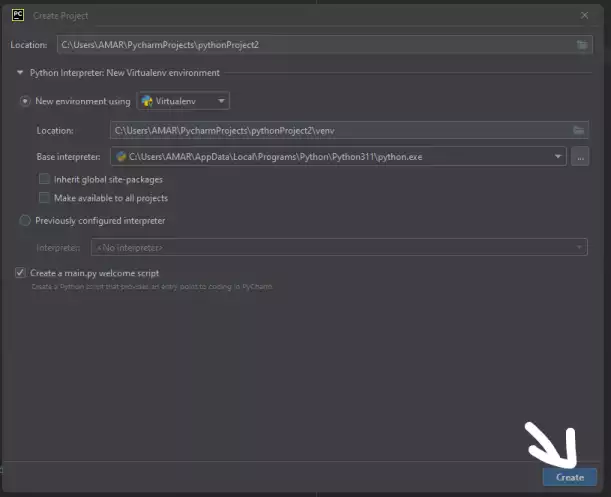
Open the PyCharm python editor and create a new project. Fill in the following information carefully.
- Location: C:\Users\PCNAME\PycharmProjects\ProjectName
- Name environment using: virtualenv
- Check “Create a main.py welcome script.“
Click on the create button at the bottom.
Step 2: Paste the code in Main.py
Copy the following Python and the PyQt5 code in the main.py file.
import sys
from PyQt5.QtCore import QUrl
from PyQt5.QtWebEngineWidgets import QWebEngineView, QWebEnginePage
from PyQt5.QtWidgets import QApplication, QVBoxLayout, QWidget

class WebBrowser(QWidget):

    def __init__(self):
        super().__init__()

        self.setWindowTitle("Web Browser")

        # Create the web view
        self.web_view = QWebEngineView(self)

        # Create the layout
        layout = QVBoxLayout(self)
        layout.addWidget(self.web_view)

        self.setLayout(layout)

        # Load a website
        self.web_view.load(QUrl("https://www.google.com"))

        self.show()

if __name__ == "__main__":
    app = QApplication(sys.argv)
    browser = WebBrowser()
    sys.exit(app.exec_())
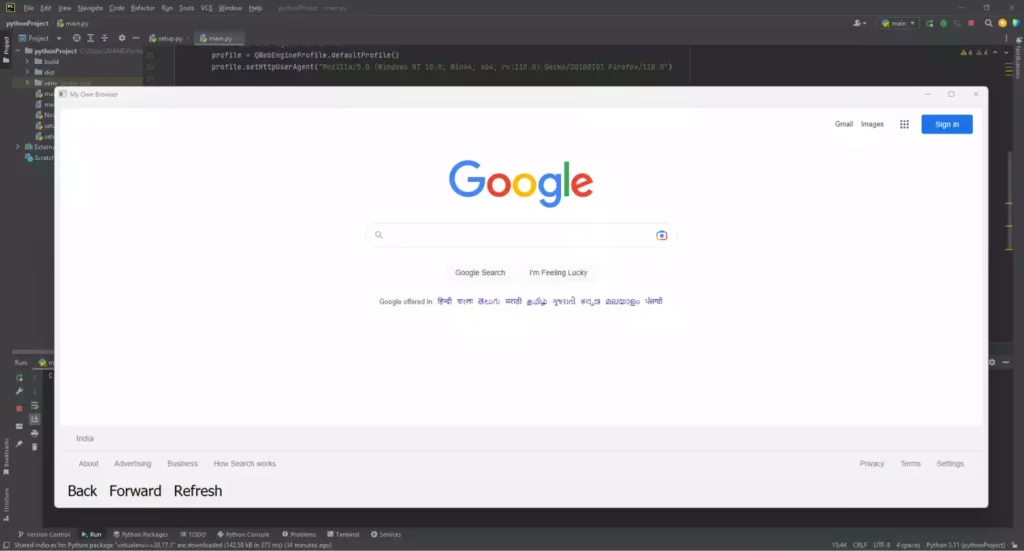
Test run the code by clicking the “Run” button at the top right corner or by pressing the “Shift + F10” button from the keyboard.
Step 3: Add Refresh, Back, and Forward Button in Python PYQT5
Replace the following code in main.py.
import sys
from PyQt5.QtCore import QUrl
from PyQt5.QtWebEngineWidgets import QWebEngineView, QWebEnginePage, QWebEngineProfile
from PyQt5.QtWidgets import QApplication, QVBoxLayout, QWidget, QToolBar, QAction

class WebBrowser(QWidget):

    def __init__(self):
        super().__init__()

        self.setWindowTitle("Web Browser")

        # Create the web view
        self.web_view = QWebEngineView(self)

        # Create the layout
        layout = QVBoxLayout(self)
        layout.addWidget(self.web_view)

        self.setLayout(layout)

        # Create the toolbar
        toolbar = QToolBar()
        layout.addWidget(toolbar)

        # Create the back button
        back_button = QAction("Back", self)
        back_button.setShortcut("Alt+Left")
        back_button.triggered.connect(self.web_view.back)
        toolbar.addAction(back_button)

        # Create the forward button
        forward_button = QAction("Forward", self)
        forward_button.setShortcut("Alt+Right")
        forward_button.triggered.connect(self.web_view.forward)
        toolbar.addAction(forward_button)

        # Create the refresh button
        refresh_button = QAction("Refresh", self)
        refresh_button.setShortcut("F5")
        refresh_button.triggered.connect(self.web_view.reload)
        toolbar.addAction(refresh_button)

        # Load a website
        self.web_view.load(QUrl("https://www.google.com"))

        self.show()

if __name__ == "__main__":
    app = QApplication(sys.argv)
    browser = WebBrowser()
    sys.exit(app.exec_())
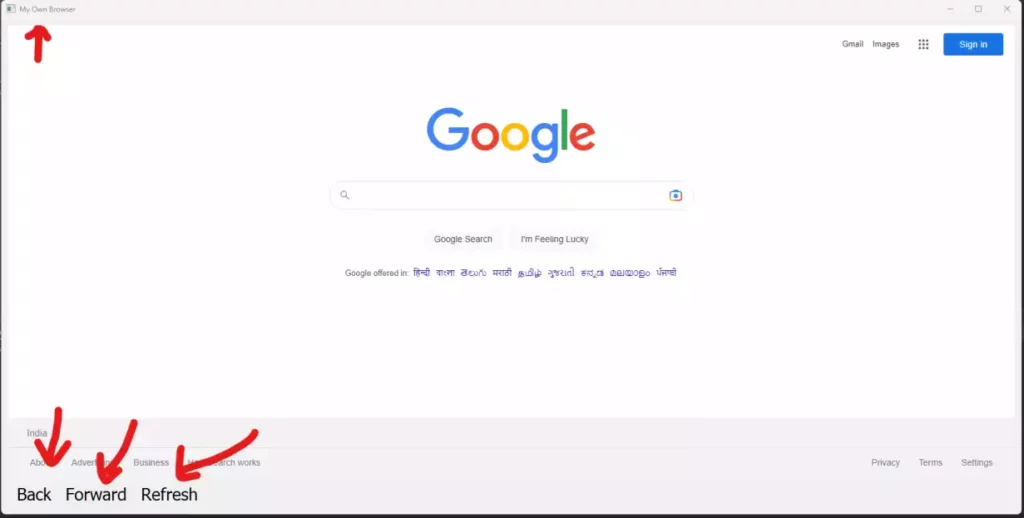
Step 4: Customize the Button in the Python Web browser
Following are the code that should be inserted to make your own browser with python that have customizable refresh, forward, and back button.
import sys
from PyQt5.QtCore import QUrl
from PyQt5.QtWebEngineWidgets import QWebEngineView, QWebEnginePage, QWebEngineProfile
from PyQt5.QtGui import QDesktopServices
from PyQt5.QtWidgets import QApplication, QVBoxLayout, QWidget, QToolBar, QAction, QToolButton


class WebPage(QWebEnginePage):


class WebBrowser(QWidget):

    def __init__(self):
        super().__init__()
        self.setMinimumSize(1000, 600)

        self.setWindowTitle("My Own Browser")

        # Create the web view
        self.web_view = QWebEngineView(self)
        self.web_view.setPage(WebPage(self.web_view))

        # Create the layout
        layout = QVBoxLayout(self)
        layout.addWidget(self.web_view)

        self.setLayout(layout)

        # Create the toolbar
        toolbar = QToolBar()
        layout.addWidget(toolbar)

          # Create the back button
        back_button = QToolButton()
        back_button.setDefaultAction(QAction("Back", self))
        back_button.setShortcut("Alt+Left")
        back_button.triggered.connect(self.web_view.back)
        back_button.setStyleSheet("margin:5px; font-size:15px;")
        toolbar.addWidget(back_button)

        # Create the forward button
        forward_button = QToolButton()
        forward_button.setDefaultAction(QAction("Forward", self))
        forward_button.setShortcut("Alt+Right")
        forward_button.triggered.connect(self.web_view.forward)
        forward_button.setStyleSheet("font-size:15px; padding:3px;")
        toolbar.addWidget(forward_button)

        # Create the refresh button
        refresh_button = QToolButton()
        refresh_button.setDefaultAction(QAction("Refresh", self))
        refresh_button.setShortcut("F5")
        refresh_button.triggered.connect(self.web_view.reload)
        refresh_button.setStyleSheet("margin:5px; font-size:15px;")
        toolbar.addWidget(refresh_button)

        # Load a website
        self.web_view.load(QUrl("https://google.com"))
        self.show()


if __name__ == "__main__":
    app = QApplication(sys.argv)
    browser = WebBrowser()
    sys.exit(app.exec_())
Read More: 12 Fixes and Solutions Why is Audio Not Working on Laptop Computer?
Step 5: Create an Exe file of the Python Browser (Py to exe)
To create your python-based PyQT5 web browser into .exe file you have to first install pyinstaller to your system. Follow the steps:
- Click on the “Terminal” at the bottom.
- Enter the following code.
Copy codepip install pyinstaller
If service is not available, make sure the internet is working and you are running Pycharm in administrative mode.
- Run the following command in the terminal window
pyinstaller --hidden-import 'package_name' --onefile 'main.py'
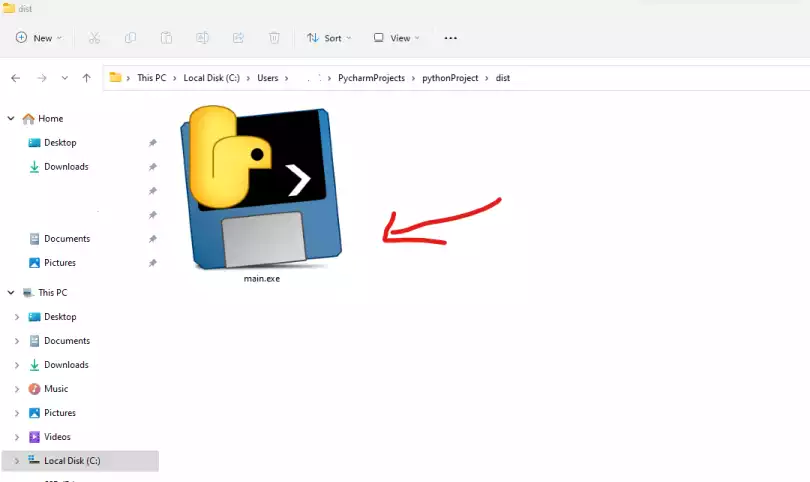
- Open the location which was entered during the creation of the new project and find the “main.exe” file.
- Double-click and run the program.
Please Note: It may take more than 20-30 seconds to load a python based web browser.
If you’re facing any problems while making a python (PyQT5) web browser for windows, you can comment and we try to solve them.
Read More: [Quick Fixes] Why is My Audio Not Working on MacBook?