How to Split Zip Files in Windows 11: A Concise Guide Steps
Managing large files and sharing them over the internet can be cumbersome sometimes. In such cases, splitting a large zip file into smaller parts can be a helpful solution. This article will guide you on how to split zip files in Windows 11, making it easier for you to manage and share these files.
Windows 11 does not have a built-in feature to split zip files, but you can use third-party tools like 7-Zip to accomplish this task. In the following sections, we will outline a step-by-step process to help you split zip files on your Windows 11 computer.
What is the Need for Splitting Zip files?
When you’re moving larger files such as those above 4.5 GB to an external USB usually shows an error sign and also if the transfer gets interrupted there might be a chance of loss of losing important information that is on those files.
So, if you are transferring larger files such as more than 4.5 GB, it is better to divide and split them into smaller sizes such as 1gbx4 or 500×8.
Creating Split Zip Files Using 7-zip
Windows 11 File Explorer does not have a built-in feature to create or combine split zip files directly. However, you can use a free, open-source tool like 7-Zip to accomplish this task. First, download and install 7-Zip on your computer. Once installed, you can create and combine split zip files easily.
Creating a Split Zip File
Creating split zip files with 7-Zip in Windows 11 is simple. Follow these steps:
- Locate the folder or file you want to compress and split.
- Right-click the folder or file, and select the “7-Zip” option from the context menu.
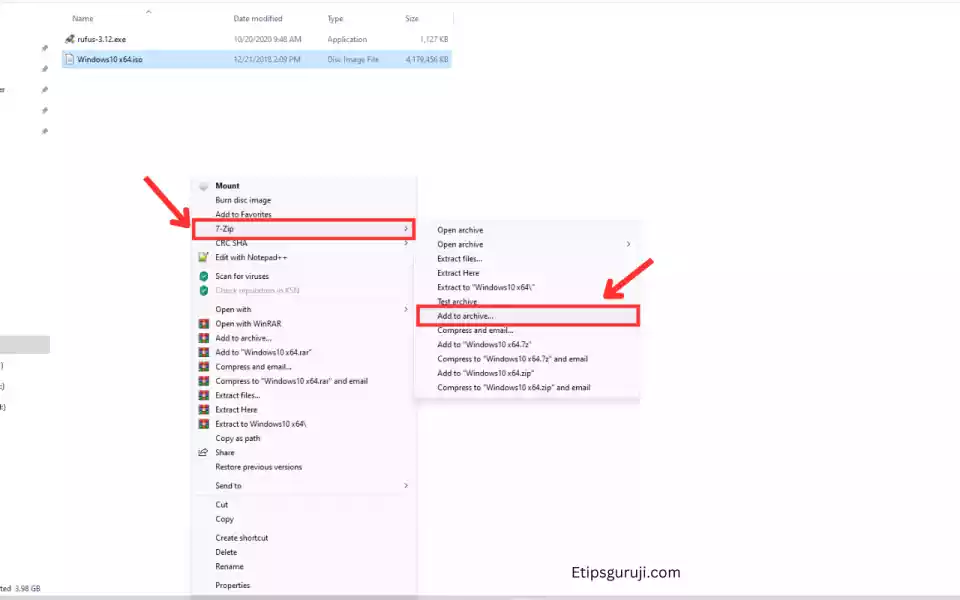
- Click “Add to archive.”
- In the “Archive format” dropdown, select “zip” or another desired format.
- Under the “Split to volumes, bytes” field, enter the desired size for each archive part (e.g., “10M” for 10 Megabytes).
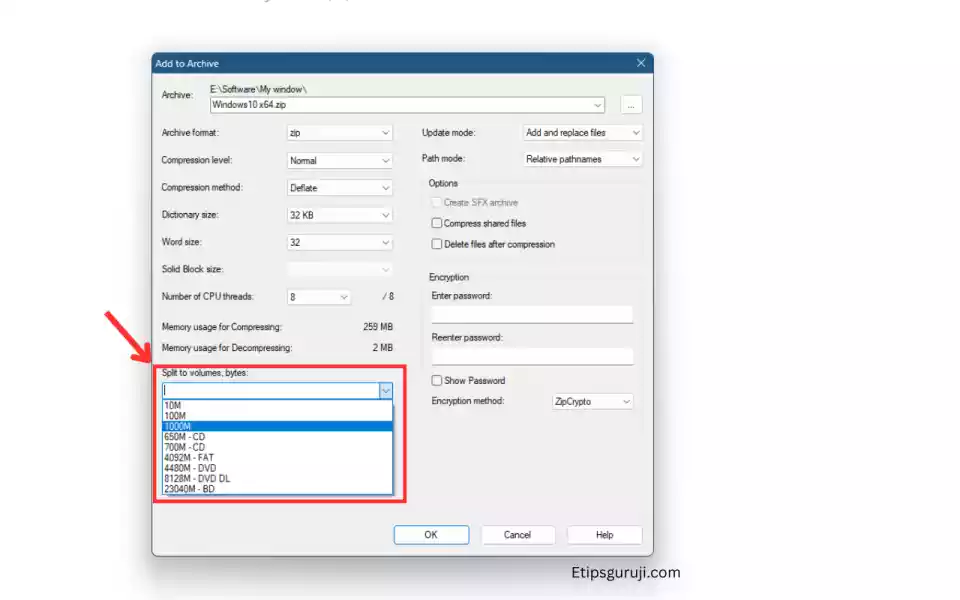
- Click “OK” to start the compression and splitting process. The split zip files will be created in the same directory as the original folder or file.
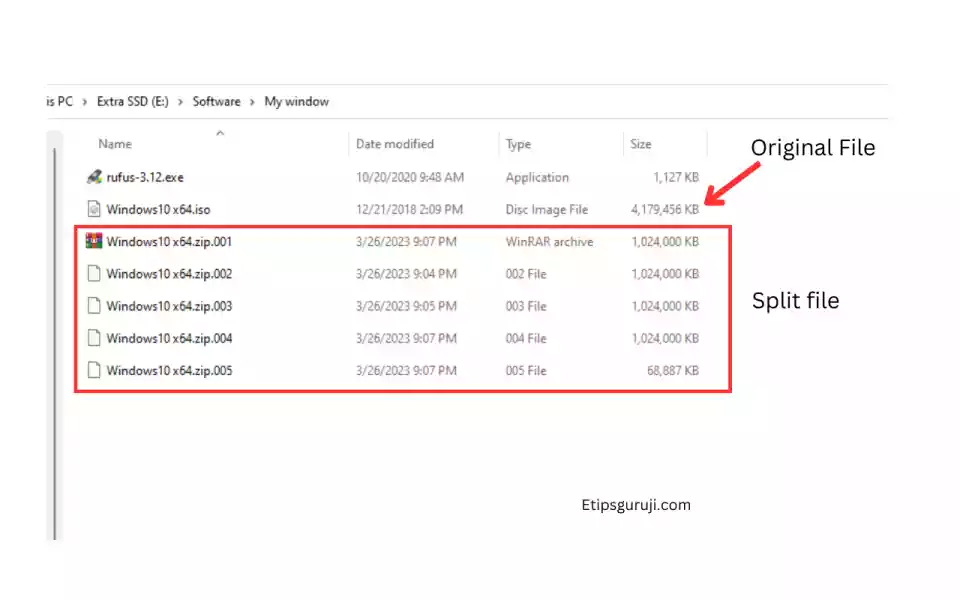
- Here is the original and split file using 7-zip
Combining Split Zip Files
To combine split zip files in Windows 11 using 7-Zip, follow these steps:
- Ensure all parts of the split zip files are in the same folder.
- Right-click the first part of the split zip file (usually with the “.001” extension or similar).
- Select the “7-Zip” option from the context menu.
- Click “Extract Here” or “Extract to” and choose a destination folder. 7-Zip will automatically detect the other parts of the split zip file and combine them during the extraction process.
- Wait for the extraction process to complete. The combined file or folder will be available in the specified destination folder.
By using 7-Zip in conjunction with Windows 11 File Explorer, you can easily create and combine split zip files for easy file sharing and storage.
Creating Split Zip Files Using WinRAR
WinRAR is a widely-used, proprietary file archiver that also offers file-splitting features. To split a zip file using WinRAR, follow these steps:
- Download and install WinRAR on your computer.
- Right-click the zip file you want to split and select “Add to archive…”.
- In the options window, check the box beside “Create SFX archive.”
- Under the “Split to volumes, size” section, select the desired split size.
- Click “OK” to start the splitting process.
Read More: